Thursday, December 14, 2017
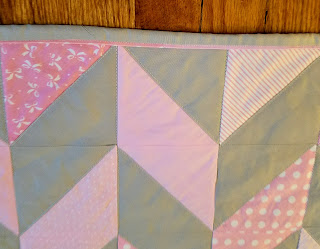
Part 3: Pink and Gray Herringbone Baby Quilt
Once the top is completed, what do you do to finish it?
This quilt will have a Minky backing. It will be finished on my domestic sewing machine, not sent to a long armer. If your quilt is going to a long armer you will need 4-5 inches of batting and backing on each side of the top. One reason I love baby quilts is that they are so easy to sew at home on your domestic machine.
I have elevated the table in my sewing room with 8" bed risers that were less than $9!
https://www.walmart.com/ip/CreativeWare-Adjustable-Bed-Riser-System/5148131 Best investment I have made for my back in a long time. This elevated table makes it easier to lay out my quilt "sandwich". Sandwich is what you call the top, batting and backing put together and ready to sew. I laid out my batting nice and smooth on the table top. Then I put the pieced top on top of the batting. Made sure none of the edges went past the batting. I like basting spray. There are many who swear by putting a safety pin every few inches. I have always loved just using the spray. I fold the top back on one side, lightly spray the batting, smooth the top out, the pull back and spray the other side.
When that is completed, I flip the whole thing over. Now batting will be facing up. I do have trouble with Minky not wanting to stick when I use the spray. So this time I sprayed the batting and the back of the Minky. I held nicely so I could get my first quilting stitches completed with no shifting.
I quilted this by quilting on the gray, very close to the edge. It makes a neat chevron pattern on the back.
The final part is the binding. I HATE hand stitching. The quilt police (and some very nice quilters) seem to think a quilt must be sewn on the front and hand stitched on the back. It just seems to me we live in the industrial age and machine stitching is very secure. I love a flanged binding. It gives the edge a look like it has piping. It adds an extra special touch AND has the security of a machine top stitching.
See what I mean? I used the gray for the outer part and the pinks for the inner part. I first saw this technique on another blog from Aunt Marti's 52 quilts http://www.52quilts.com/2012/05/tuesday-tutorial-susies-magic-binding.html There are several others available on pinterest.
So another baby quilt finished. Originally it was 40x48 inches. I always wash my quilts as soon as I finish. That removes any finishes left by the manufacturing process and shrinkage or color bleeding I will have to deal with, not the new owner. It seems to measure now 38x46.5.
It is now available on my Etsy shop: https://www.etsy.com/listing/566614808/baby-girl-pink-and-gray-herringbone?ref=shop_home_active_1
Now you know how to make your own, or if not enough time or motivation, this one is available to purchase.
Subscribe to:
Post Comments (Atom)


No comments:
Post a Comment