Saturday, January 20, 2018

New Challenge - Applique

I have been busy using/learning several applique techniques.  I can tell practice will make perfect.  I have had a few I have thrown in the trash.  I have used several products to see what will work best for me.
4 days of work
 In preparation for this quilt I had purchased http://www.joann.com/sulky-water-soluble-stabilizer-roll-12inw-x-9yds/5555180.html 
I thought this was just what I need for turned applique as it would wash away and I would not have to remove as one does for freezer paper applique.  But as it was clear with a plastic feel, it did not take kindly to having the edges ironed down.
 For the sun, I eventually used a technique from Lori Holt at Bee in My Bonnet.  http://beeinmybonnetco.blogspot.com/2015/10/sew-simple-shapes-tutorial-using-pellon.html
I made a quick run to Walmart after being frustrated with Sulky stabilizer for my purposes.  I purchased featherweight iron on interfacing and sheer weight.  The sheer weight was just too light and poked through when I turned it.  I am very pleased with the featherweight, which still feels substantial even though called featherweight.
 I moved on to raw edge applique with the tree branch.  Used Heat and Bond Lite which is double sided iron on adhesive and raw edge appliqued along the edges.
 I used Lori Holt's technique for my little bird.  See how puffy it looks?  Since the iron on adhesive is on the back side, I cannot iron it out until ready to attach to the background fabric.  Both the leaves and birds were with the interfacing technique and looked puffy till stitched down.  I have read several blogs and seen video tutorials about invisible stitching of applique pieces.  But for this, my first big applique project I am using a combo of zigzag and straight stitching to do the final attachment.
Starting to look cute.  I am pleased with this. 
 

Wednesday, January 17, 2018

New Challenge

This is the quilt I made for my first grandbaby.  I took things that make me happy from all sorts of places and put them together.  I find this a happy quilt.

Now based on this, I have been commissioned to make a customized quilt.  The person ordering the quilt likes this idea, but wants the quilt to be appliqued rather than pieced.

I have done very little applique.  So I have spent a few weeks watching tutorials, reading tutorials and trying different things.

I will share my progress as I go.

Today is a cold and rainy day with the possibility of snow (even here in South Carolina).  Perfect day to stay in and "quilt till I wilt".

Trying to decide between listening to Lord of the Rings or a new book by Nancy Pearson while I sew today.

Wednesday, January 10, 2018

Hexagons Part 3

Finally finished first hexagon quilt
Finally finished my first hexagon quilt!  

I have avoided hexagons, even though I love the look, because so many were hand pieced.  To sew by machine requires the dreaded Y seam.  After viewing many blogs and tutorials on how to machine sew them, I took the plunge.  My favorite tutorial was Rita of Red Pepper Quilts.  http://www.redpepperquilts.com/2017/02/tutorial-sewing-hexagon-quilt-by-machine.html     I enjoy following her blog.  There is just something about her fabric/color choices and piecing that I love.  I keep staring and trying to figure out what it is exactly that I love about her work.  I love the fact that she uses very simple straight line quilting on almost all of her work.  I also prefer to let the piecing be the star and am encouraged by her example.

I used large hexagons for a more modern look (and easier to sew).  Following Rita's tutorial, the top sewed together easily in one afternoon.   That was surprising.

It took over an hour to decide on a font for baby's name.  I used the darkest of the prints, but the contrast was not great enough.  It was raw edge applique, so I used a dark gray and stitched around each letter 3 times.  Then I discovered I had a gold permanent pen and outlined inside each letter with gold to coordinate with the writing on the phrase fabrics.  Kinda pleased with how it turned out. 

My DSM (dear sweet man) is a great quilting husband.  He will happily discuss color/pattern/quilting with me.  He will crawl around on the floor helping me to baste a quilt sandwich.  He doesn't mind if I spend all day in my pajamas sewing.  His suggestion was to stitch in the ditch around each hexagon.  He does go for the simple.  But I decided to use a random wave pattern lengthwise over the whole thing to emphasize the mermaid/water theme.  Gotta say I like how that turned out also. 

So, if you have been afraid to tackle a hexagon quilt, I encourage you to give it a try.  I also have the half hexy ruler from Missouri Star Quilt Company that I am anxious to try out.  Hexagons with no y seams. 


Saturday, January 6, 2018

Hexagons Part 2

Spent a day to starch the fabric and cut out the hexagons.  Foolishly thought I was ready to sew.   Since new mom's theme is mermaids, I purchased Michael Miller's Mermaid Magic by Sarah Jane in the aqua/light teal color scheme and 2 companion fabrics.  3 fabrics could make a hexagon quilt without any of the same touching.  But when laid out, I was not happy with it.  Then begins the day long process of rearranging, then deciding I really needed more fabrics.  Went to the local fabric shop where I knew there was a good selection of Kona Cotton solid color fabrics.  There was a gray in the mermaid fabric, so I selected a nice light gray.  Then I found a match to the background color in the mermaid fabric.  I was looking for a darker teal to match the striped fabric, but the colors available did not quite work.  After trying several combos, I decided the gray just looked flat and dull.  Maybe it needed some white.  I had in my stash white on white with circles.  That should look good with bubbles and mermaids.  It was too bright and stark!  This is what takes me the longest on a quilt - the final design.  I can color all sorts of graph pages and hexy coloring pages, but when you lay it out, it can all change.  Here are some examples of what I tried.
Too monochromatic

Added gray and aqua, but gray just looked dull and dead.


Just aqua, so 4 fabrics - ok, but not floating my boat.


Kinda liking this, but don't like the way the stripes work out.

Threw the gray back in, still don't like.

 
Finally decided on this after crawling around on the floor all afternoon! 
I did have to go back and fussy cut some more of the fabric with wording so all phrases are complete.  The top will have the baby's name.

Thursday, January 4, 2018

This week it is all about Hexagons! Part 1

Hexagons are cool right now.  I see them everywhere, not just in quilts.  They are the background in many commercials right now.  They are hot.

Disliking hand stitching has kept me from jumping in, but with a new year, new experiences!  A niece is expecting a baby and the shower is in a couple of weeks.  What better excuse to try something new?  I have watched several online tutorials on how to machine sew hexagons.  I purchased Marti Mitchell's "favorite" hexagon ruler. https://www.frommarti.com/rulerhex.shtml

The directions for using this ruler on are the webpage and easy to strip cut.
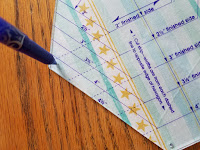
Holes in each point to mark the spot where you begin and end sewing.
Easy to knock out the entire stack.


As you can see, I am making large hexies.  This will give it a modern look and hopefully be easier to sew.
The new mom's theme is mermaids.    I have 3 fabrics from Michael Miller's Mermaid Magic by Sarah Jane .  New mom hates pink, so I have selected 3 coordinating fabrics in mints, aquas, and teals.